 TraceForge
Your first project
Use the included practice project to inspect, edit, save and check a small circuit.
On this page
What you will do
Open an existing schematic and board, make a harmless title-block comment change on a copy, then save and reopen it. This is a short orientation task, not a circuit-design benchmark. You do not need an AI provider for the manual steps.
The practice project is KiCad's interf_u demonstration, distributed with its CC BY-SA 4.0 license and source attribution. It is not an AI-generated board or a manufacturing recommendation.
1. Get a disposable project
Download the practice project ZIP. Extract it completely, including the local library tables and footprint directory. Duplicate the extracted folder as interf-u-working; keep the first copy untouched.
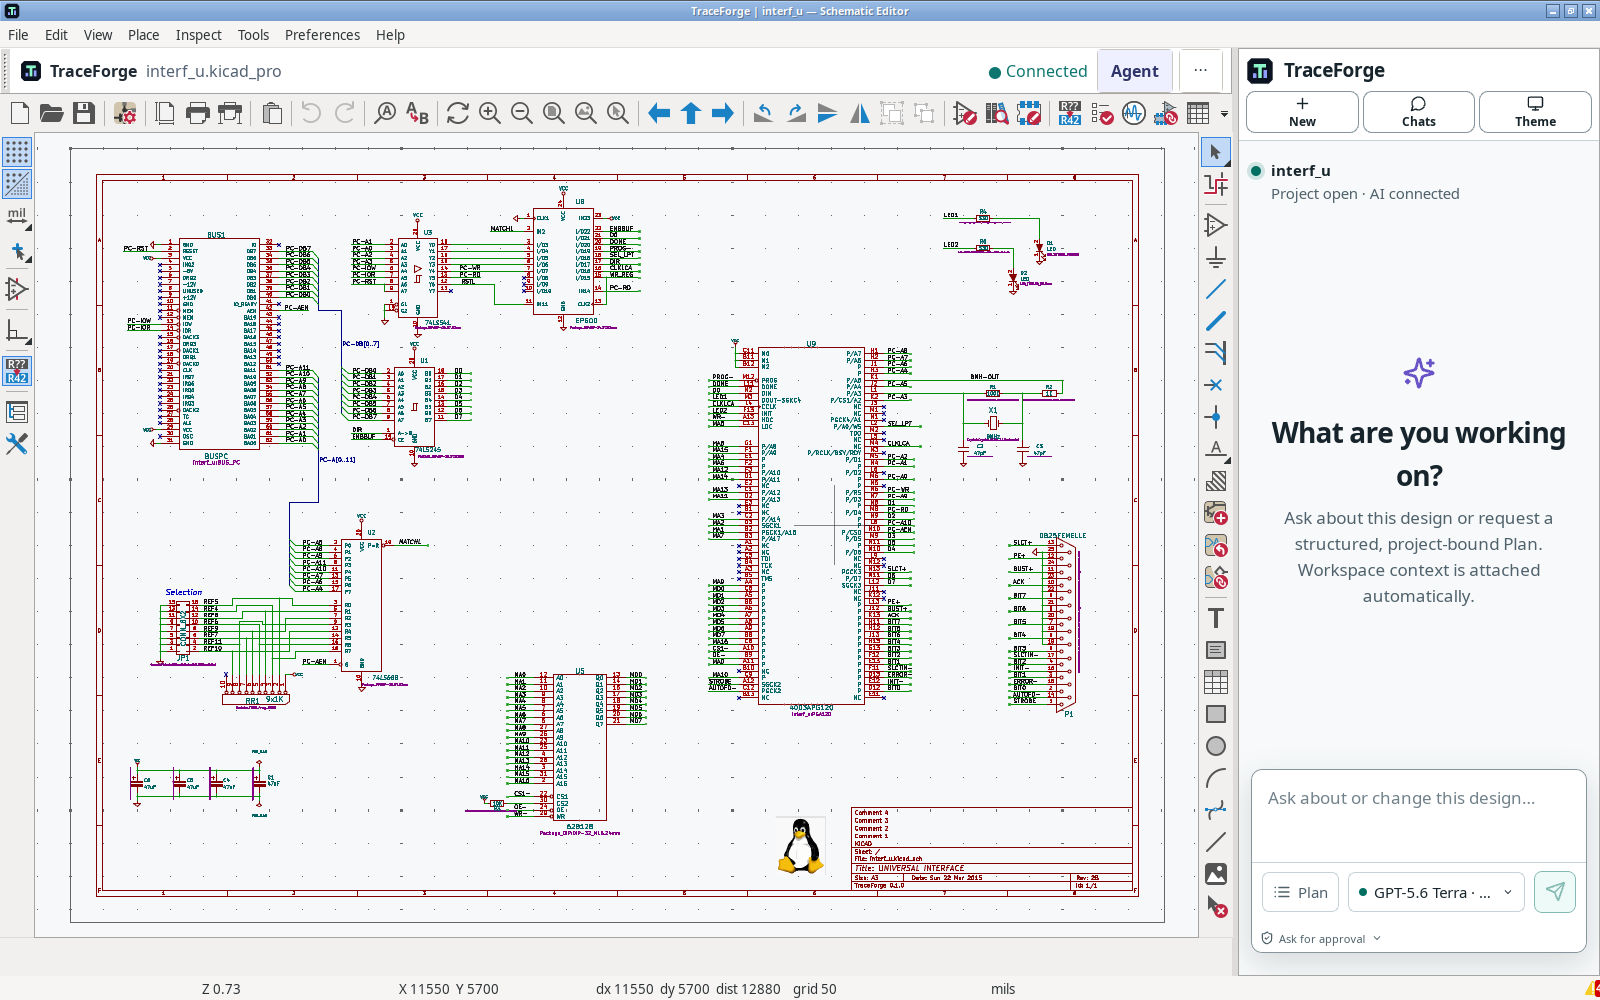
Open interf_u.kicad_pro from the working folder. If prompted to convert an older format, convert only this copy. Open the schematic and board. Both should show an existing populated design.
2. Inspect without editing
Locate a connector and follow one of its labelled nets in the schematic. Open the board and locate the corresponding reference. Zoom and pan to confirm you can read labels. If symbols or footprints are missing, use the library guide before continuing.
Check: the Agent's project name, editor title and folder all refer to interf_u. A connected Agent is optional at this stage.
3. Make one manual change
In the schematic editor, open File → Page Settings. Replace the placeholder Comment 4 in title-block comment field 4 with TraceForge practice copy. Confirm the dialog and save. Do not change a component value, wire, footprint or board rule.
Close the schematic, reopen it and inspect Page Settings again. The comment should still be there. Confirm that the original extracted folder does not have your new comment.
Expected result: persistence works and the working copy differs only by your annotation and any explicit format conversion. If you converted the project, do not mistake serialization changes for AI engineering work.
4. Run a baseline check
Open Inspect → Electrical Rules Checker and run ERC. Inspect one reported item, if any. Record what you see rather than assuming an upstream demo must have zero findings under your current rules. Repeat with Design Rules Checker in the board editor.
For reference, the retained TraceForge 10.0.5/Linux CLI check of this exact example reported 22 ERC findings and 3 DRC findings, with zero unconnected board items. These counts were unchanged after the title-comment edit; rules and versions may change your results. They are not a design certification.
The exercise passes when you can locate and explain a result—not when you suppress every warning. Your title-block comment should not intentionally change connectivity or geometry.
5. Optional: try the Agent
With working AI access, request: “Inspect this project and describe the power connections. Do not edit files.” Compare the response with the schematic. Then request a Plan for another title-block-only comment change, explicitly requiring review before application.
Follow Plan and Changes. On your first candidate, choose Reject and verify the trusted working file remains unchanged. AI output and timings vary; this tutorial does not promise an identical response or a scored result.
Finish and recover
Keep your notes and working copy, or remove only that disposable copy. Do not delete the installed libraries or your real project directory. If a step fails, use troubleshooting with the step number, app version and safe error text.